You can send PDFs, photos, videos, and locations. This feature is available on Darwin+ and Darwin Pro.
1. Log into your account at darwinnow.io and go to the template settings
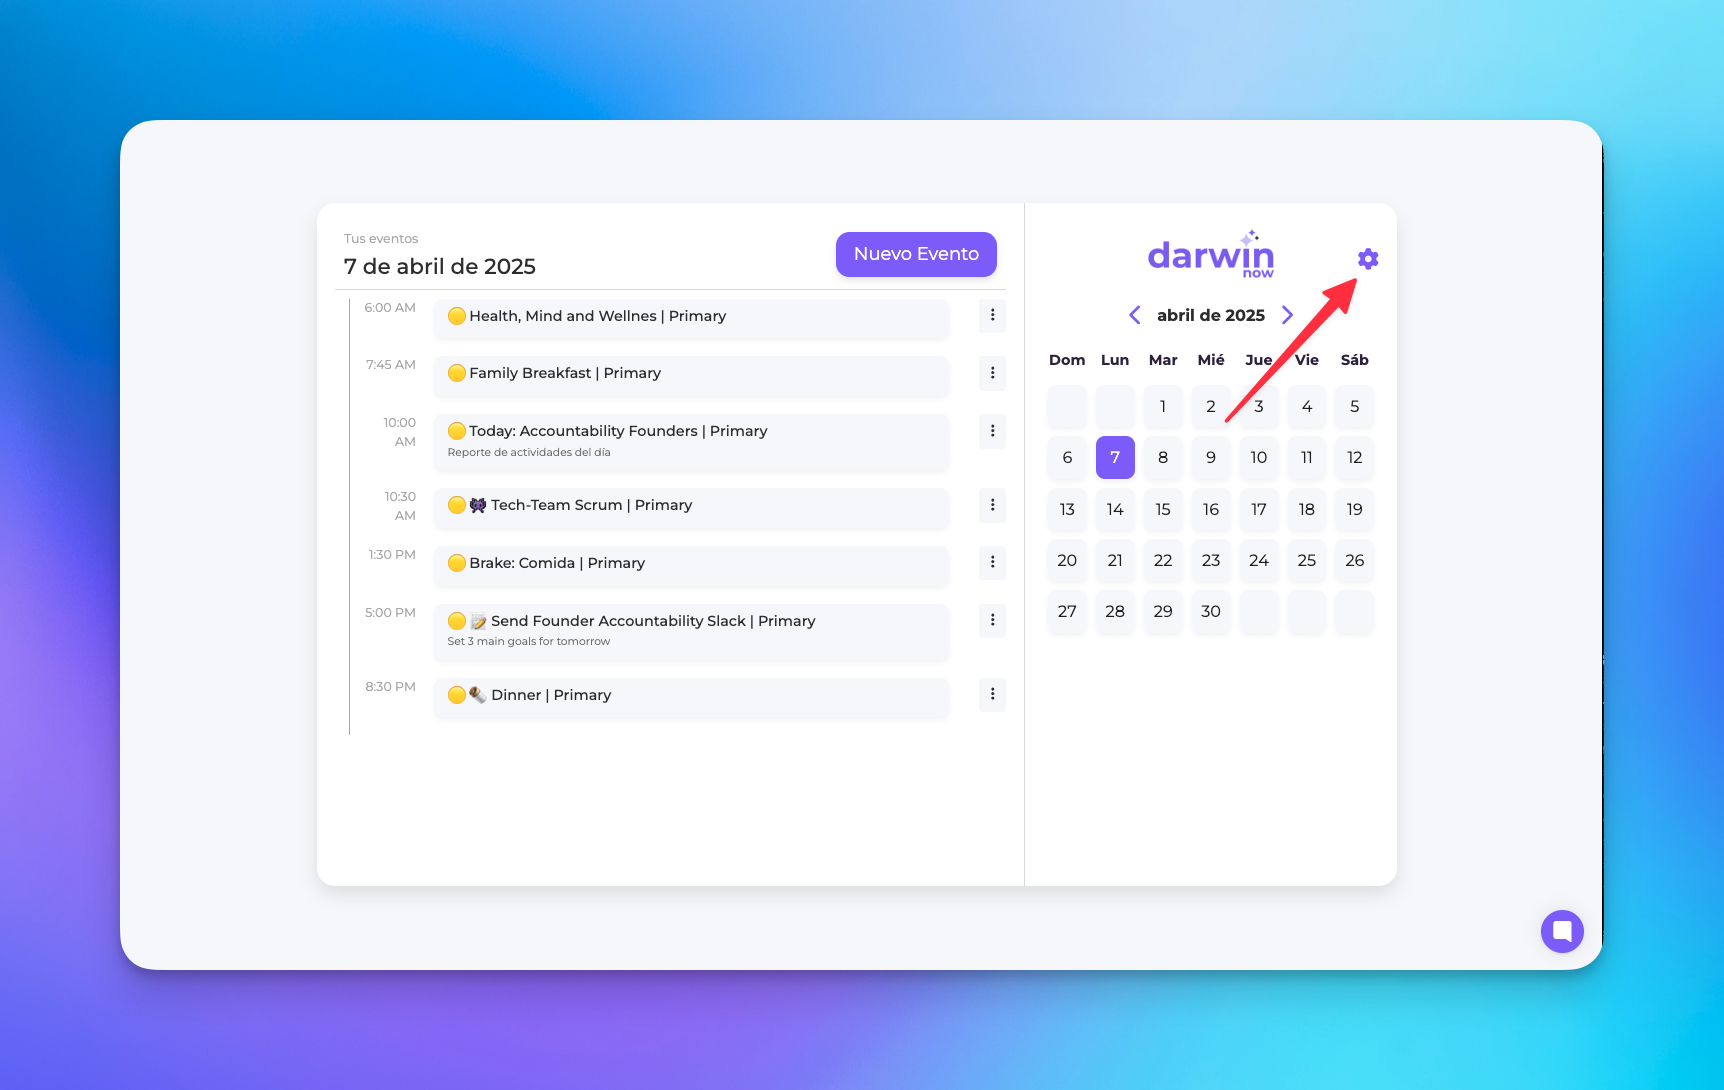
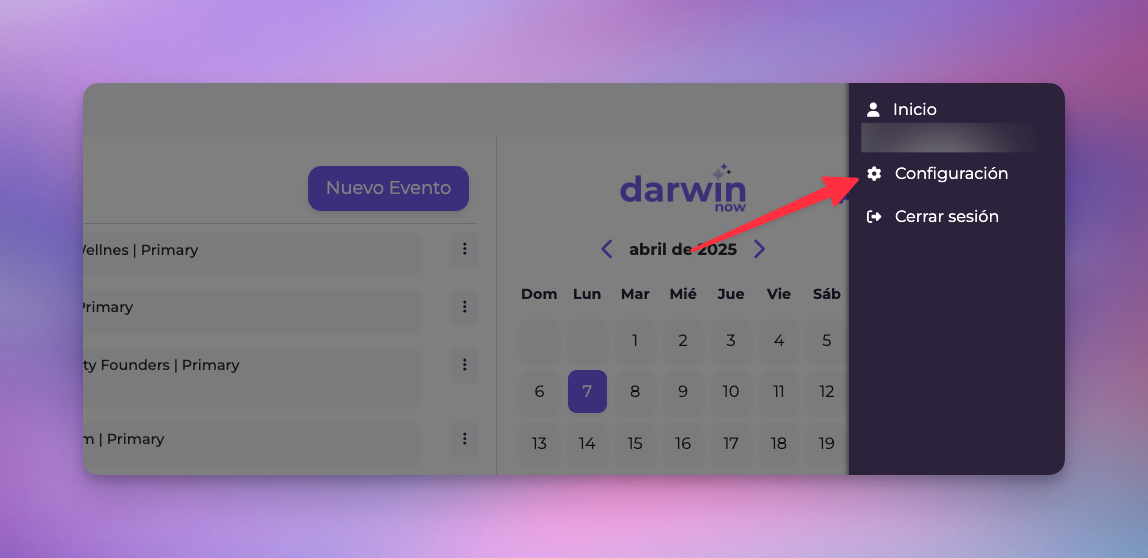
From the Darwin Now web panel:
Click on the gear icon in the top right corner.
Select the "Settings" option.
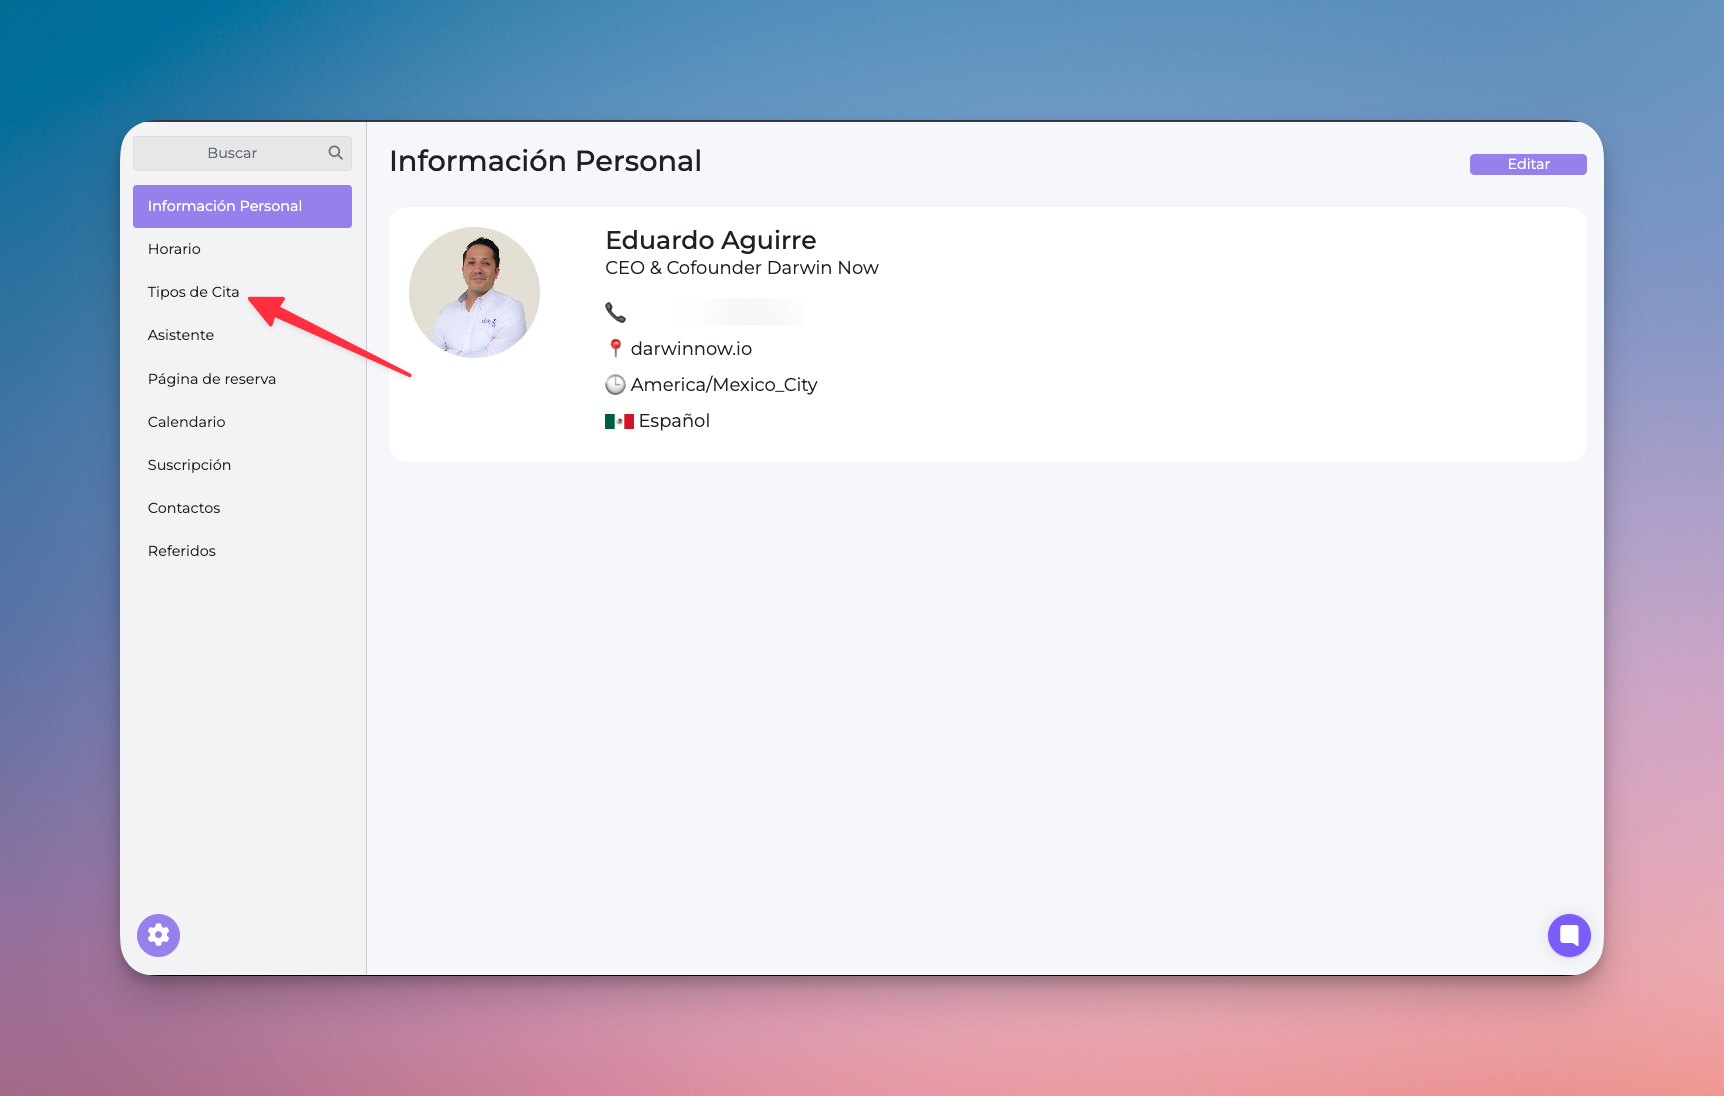
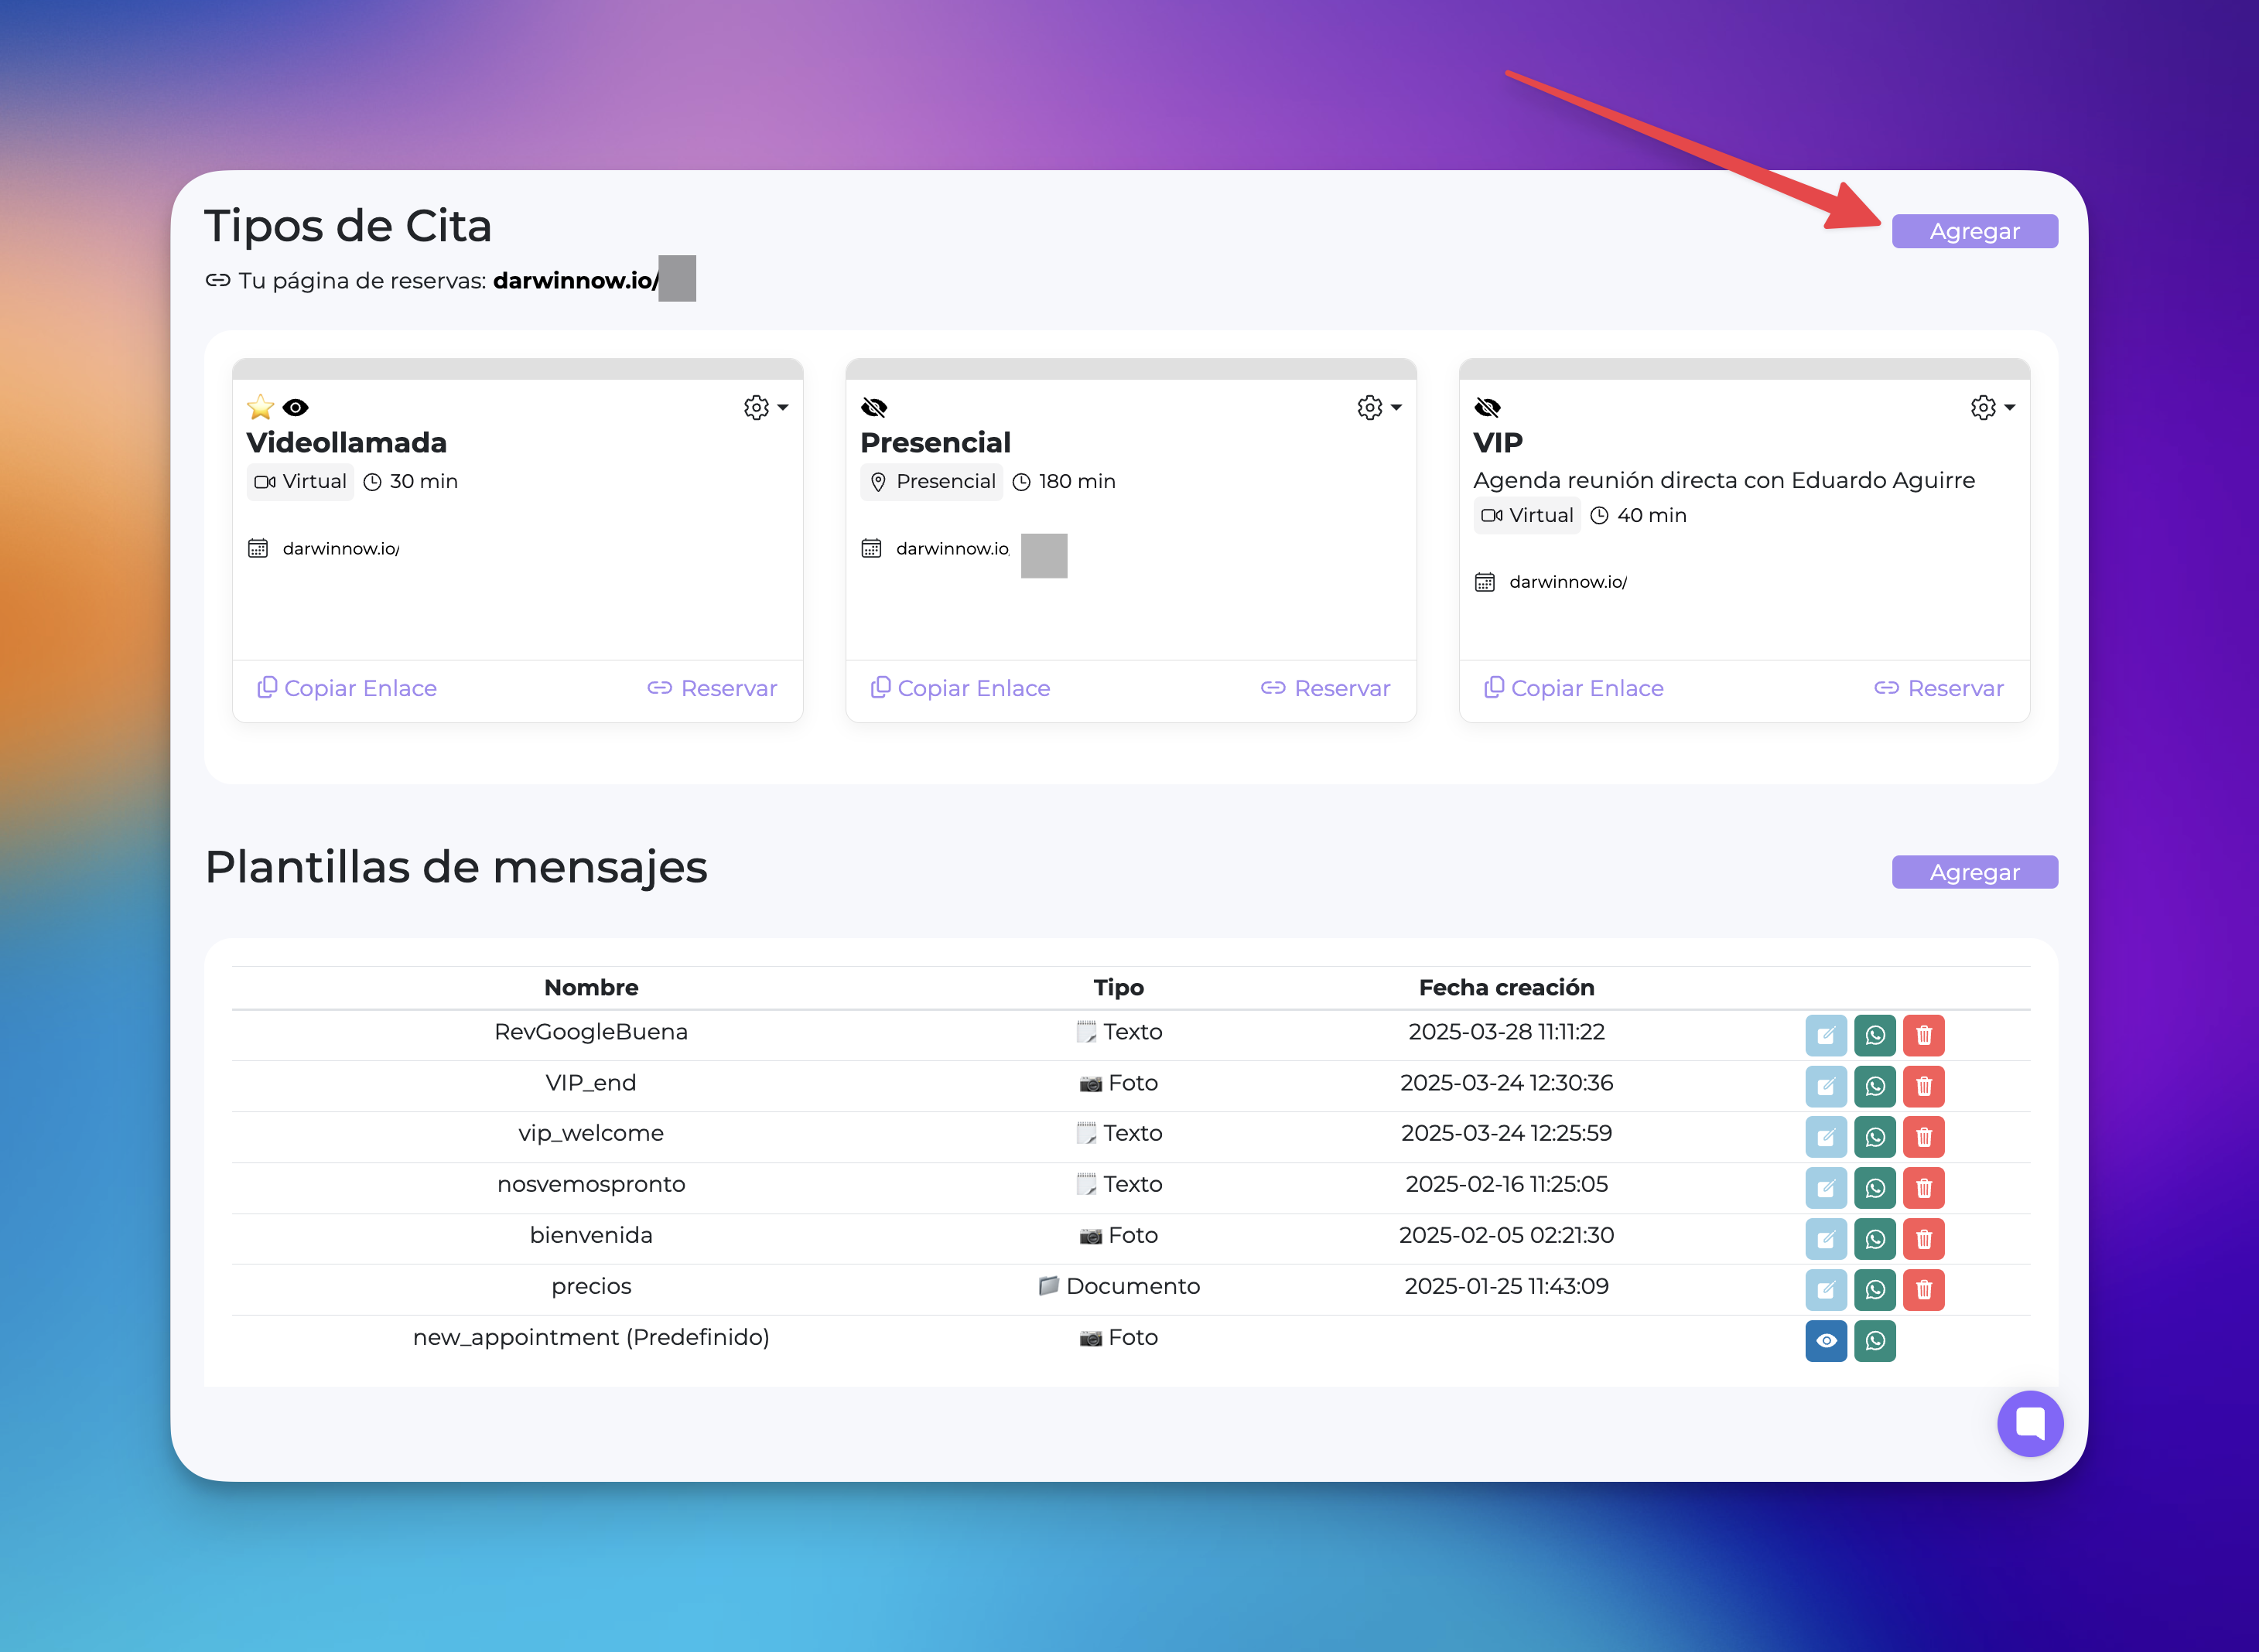
In the side menu, choose "Appointment Types."
Scroll down to find "Message Templates."
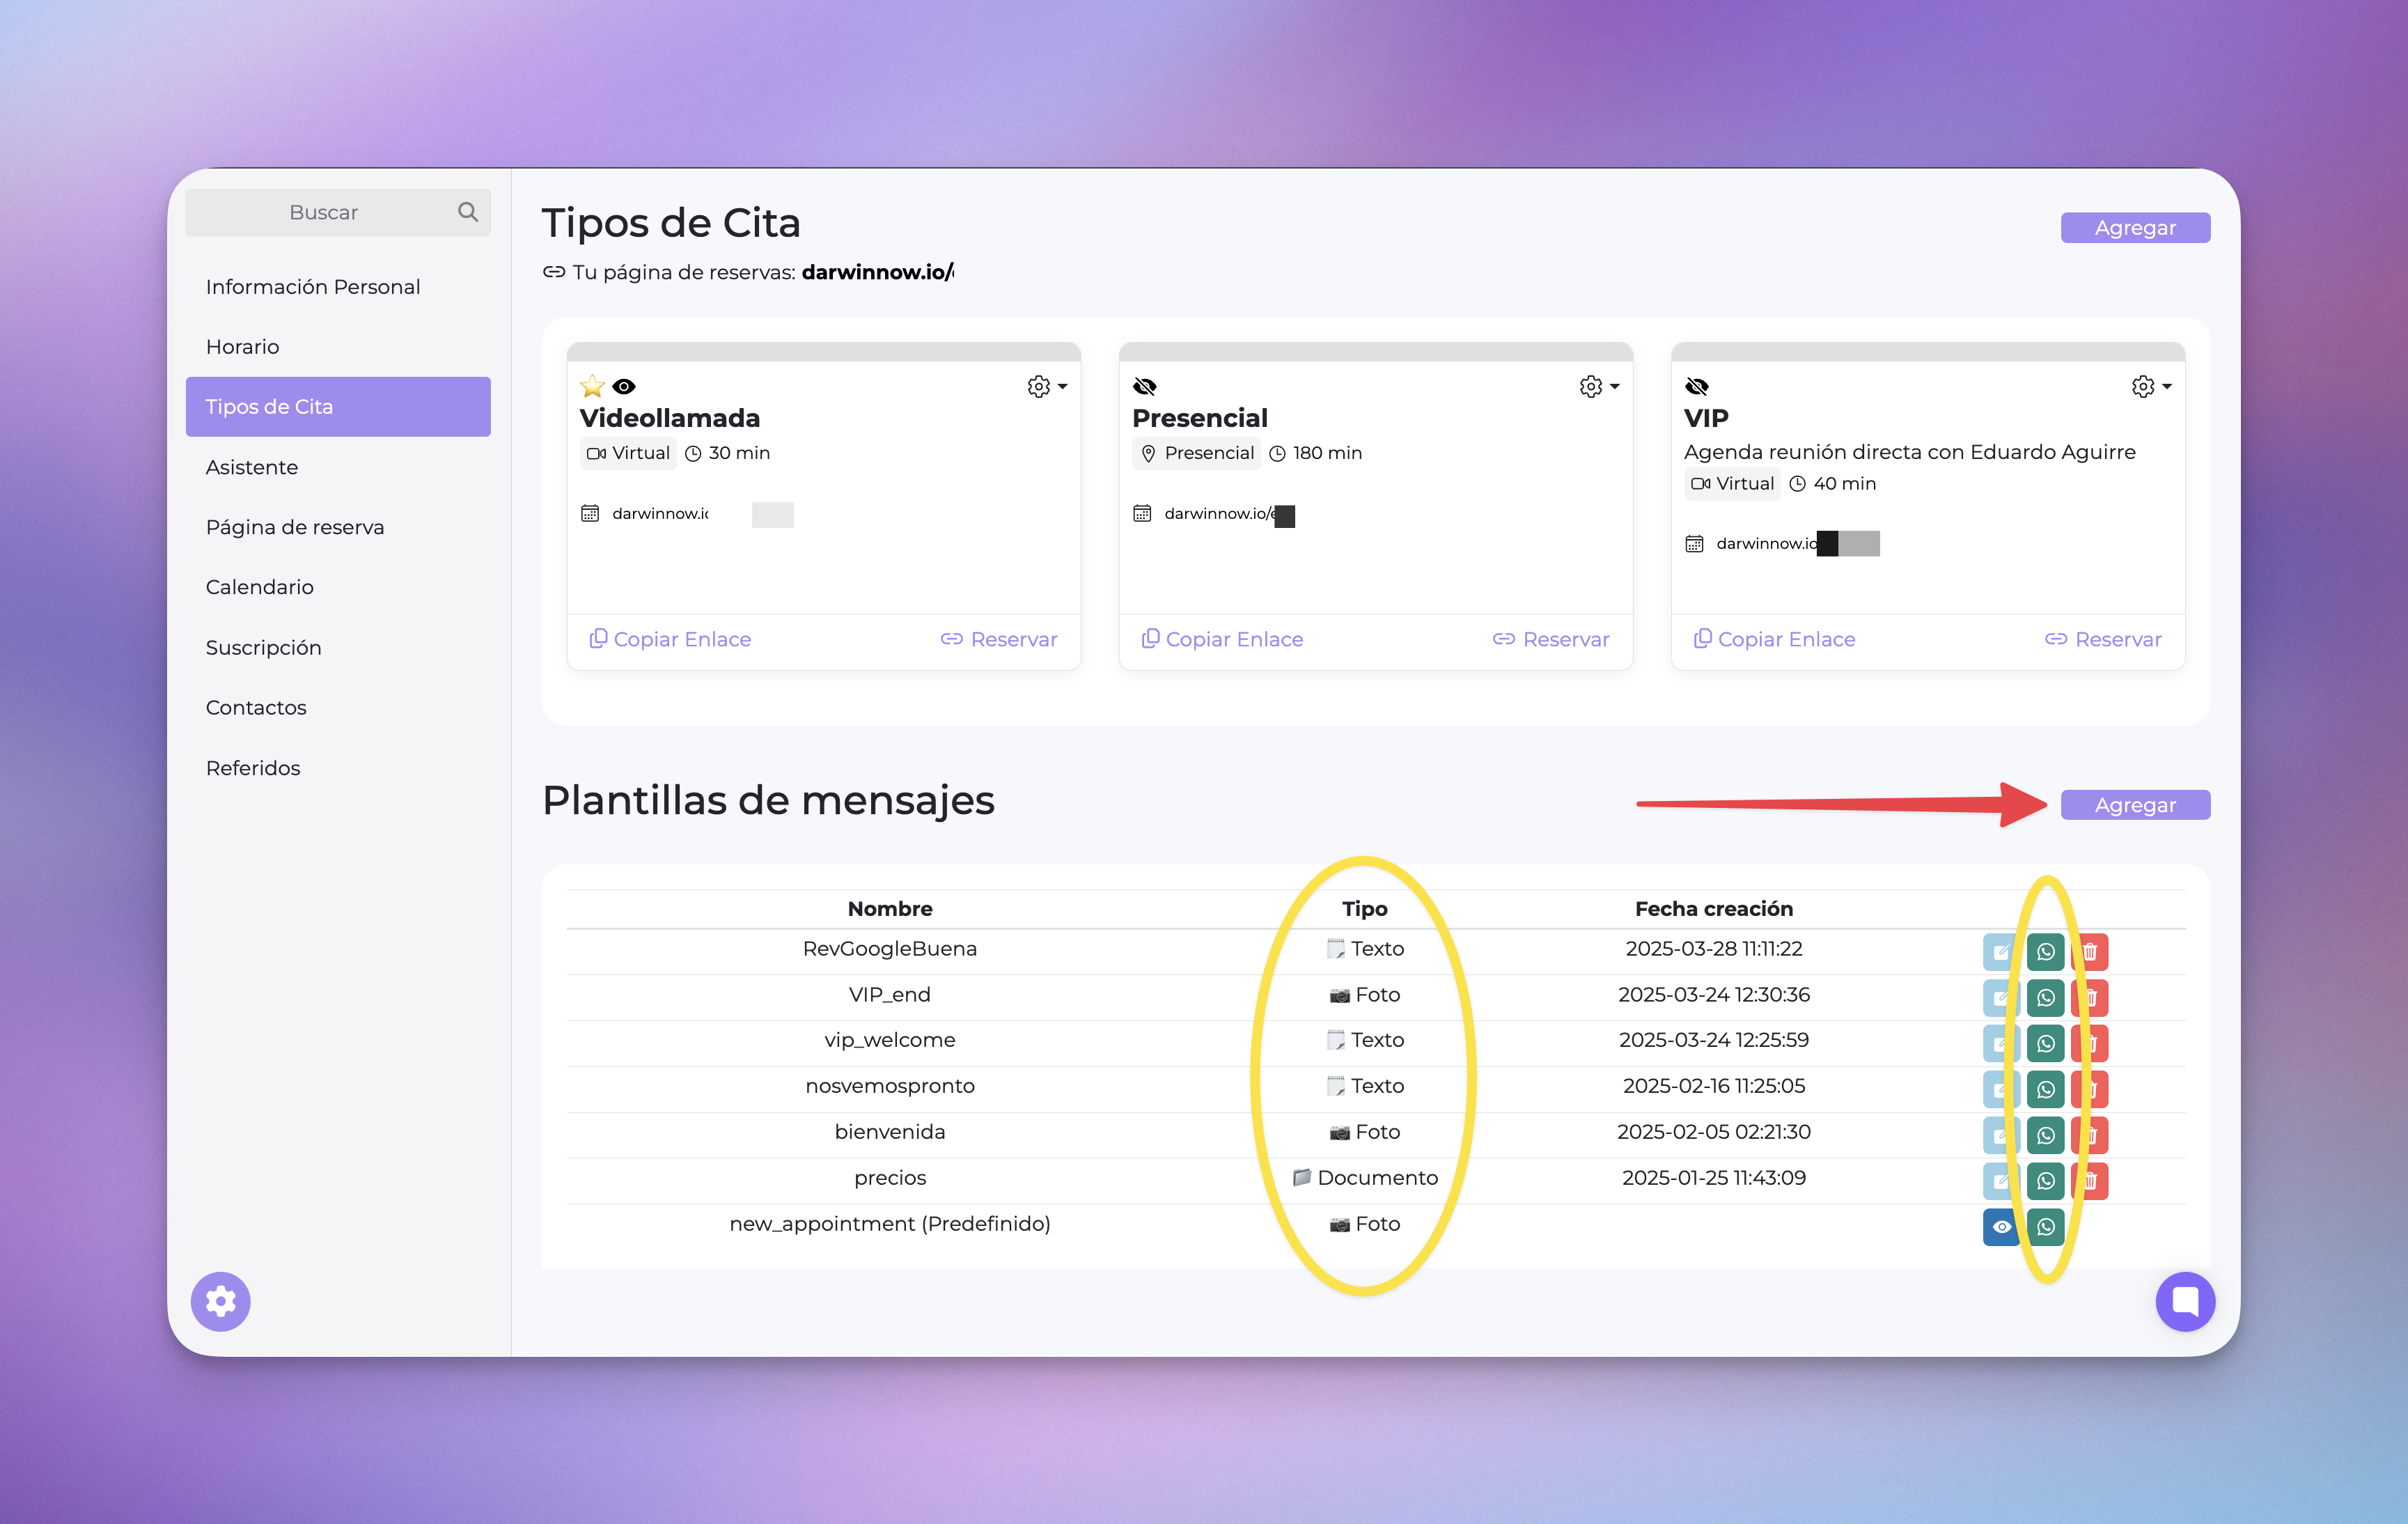
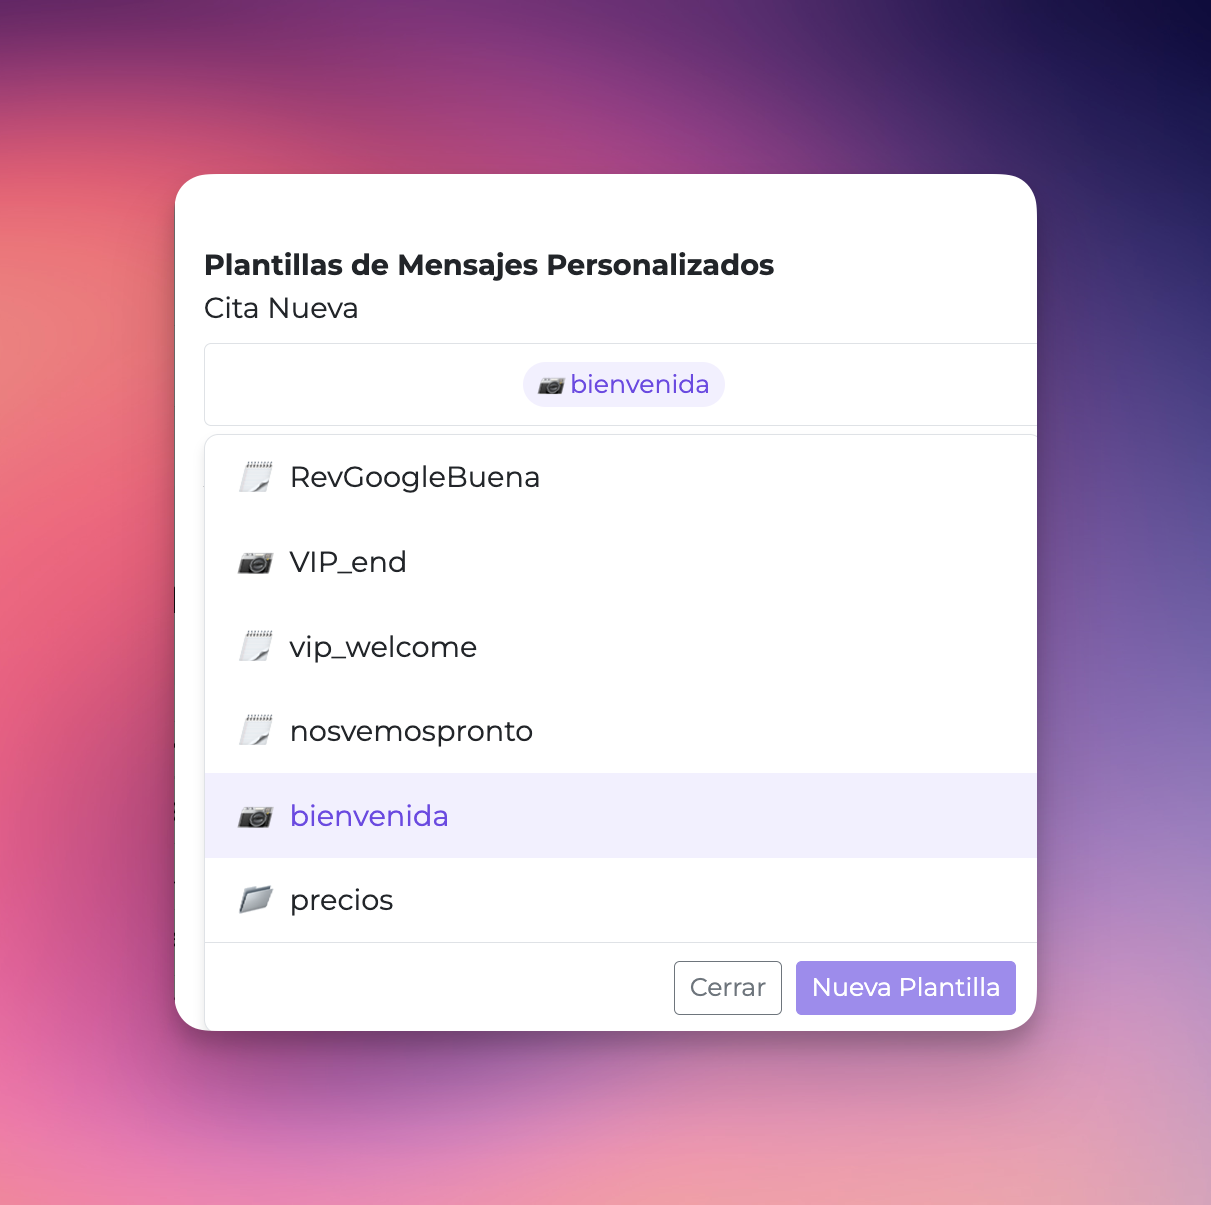
In this section, you'll be able to view your existing templates, and once you've created one, you can send a test message to your WhatsApp to preview it.
To create a new template, tap the “Add” button.
A window like this will appear 👇🏼
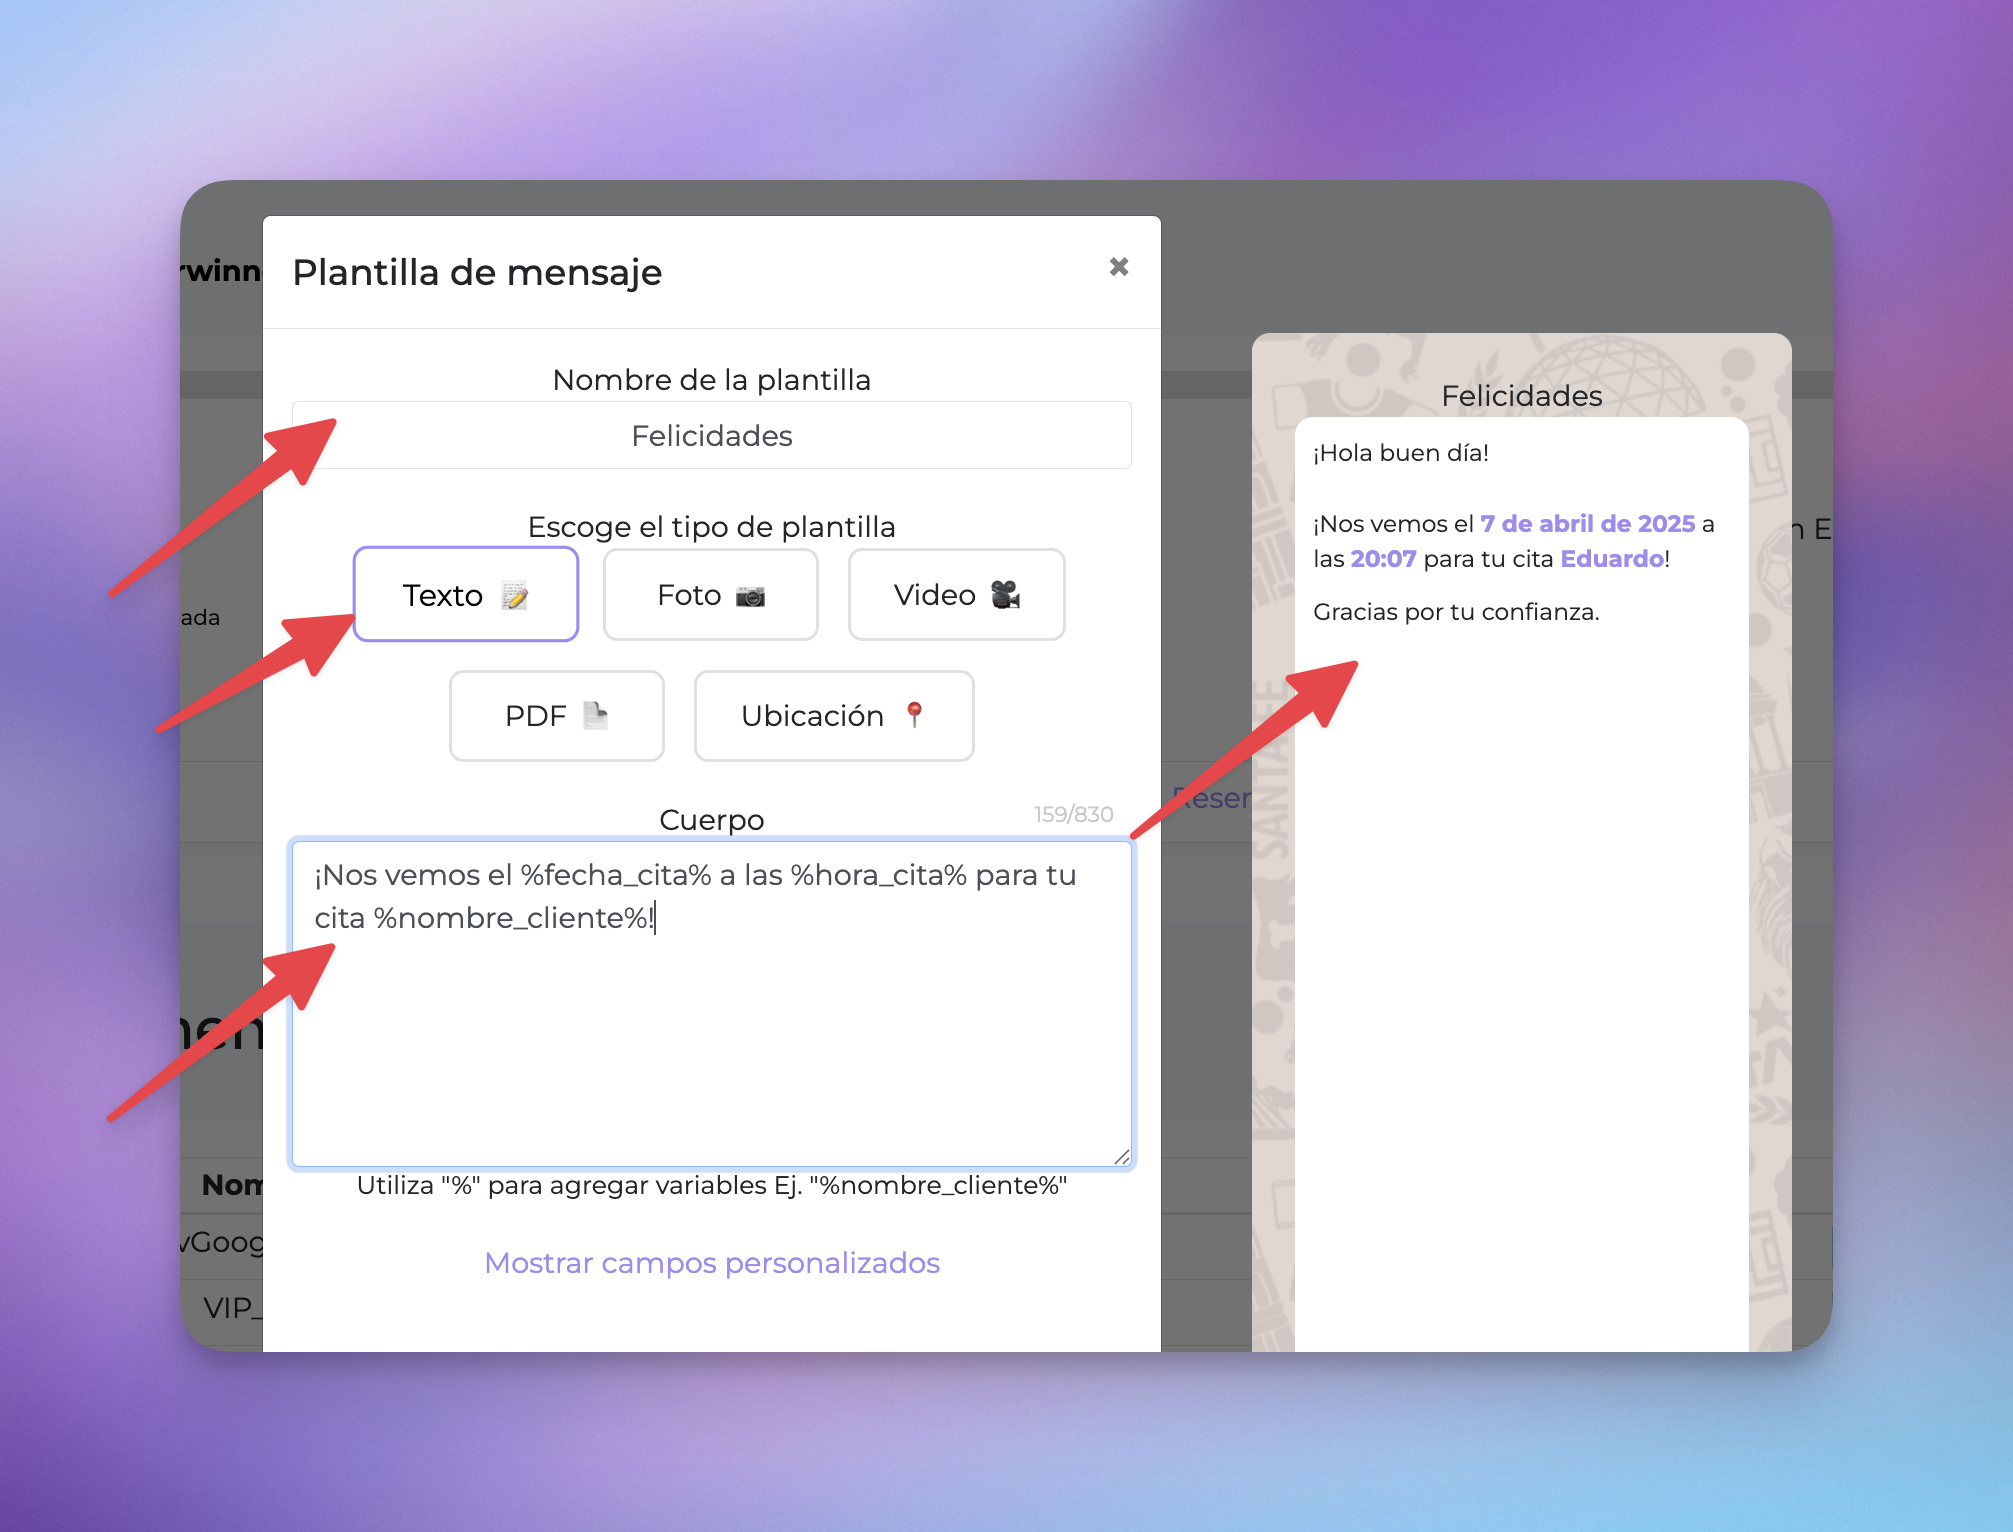
You’ll be able to define different message types:
Image: JPG, JPEG, or PNG
Video: MP4
PDF: under 35 MB
Text
Location

Assign a Template Name
Give your template a name that helps you identify it easily.
Select Message Type
Choose the format (text, image, video, PDF, or location).
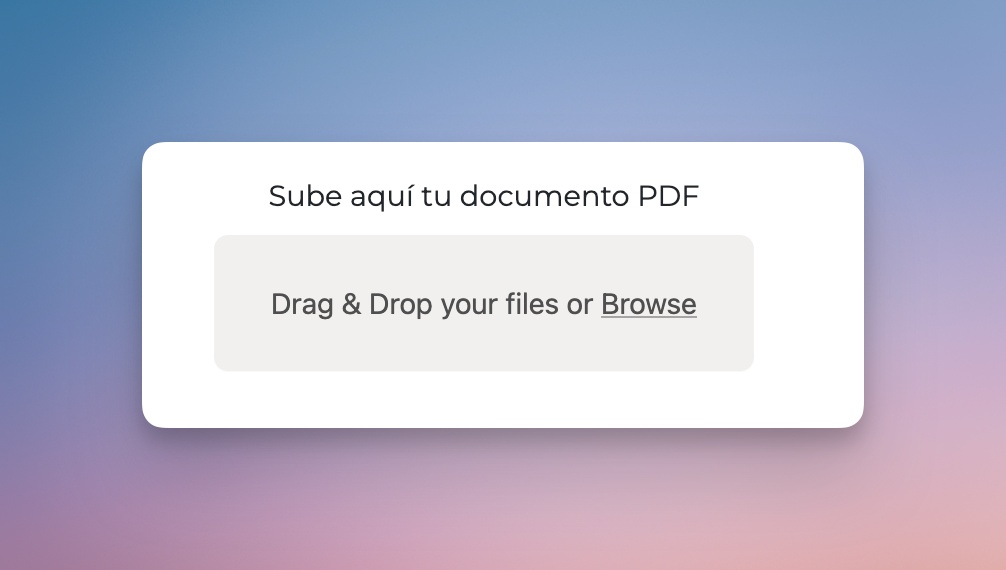
If you selected an image, video, or PDF, upload the file
If you chose a multimedia type, upload the corresponding file.
If you selected a location:
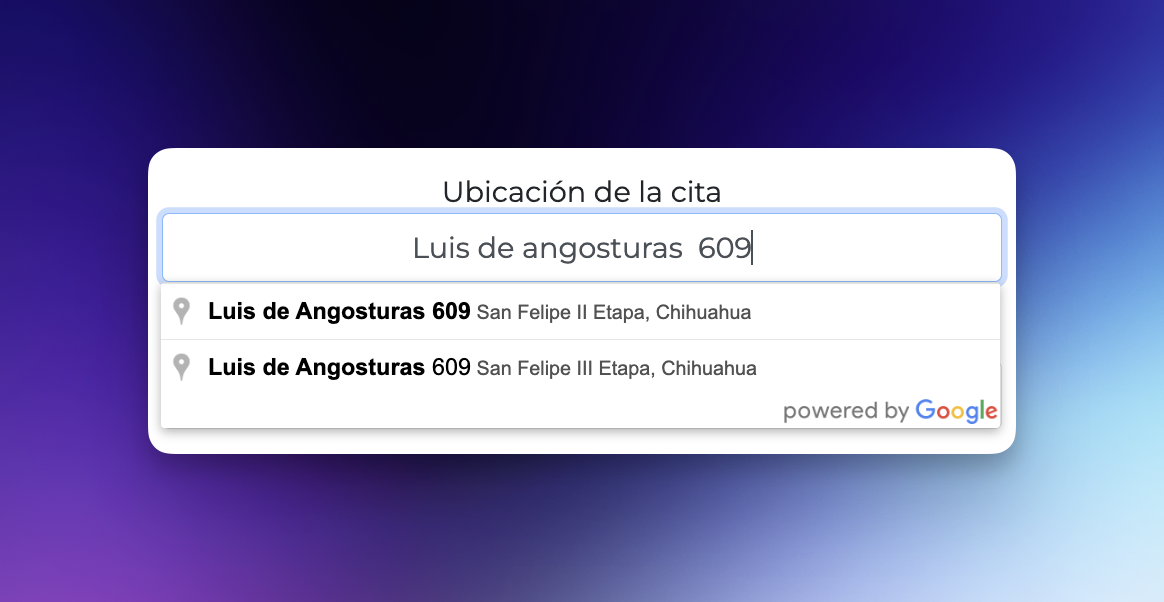
A field will appear for "Location Address." Type and select the address as you would on Google Maps.
Enter a name for the location. This will help you identify it later.
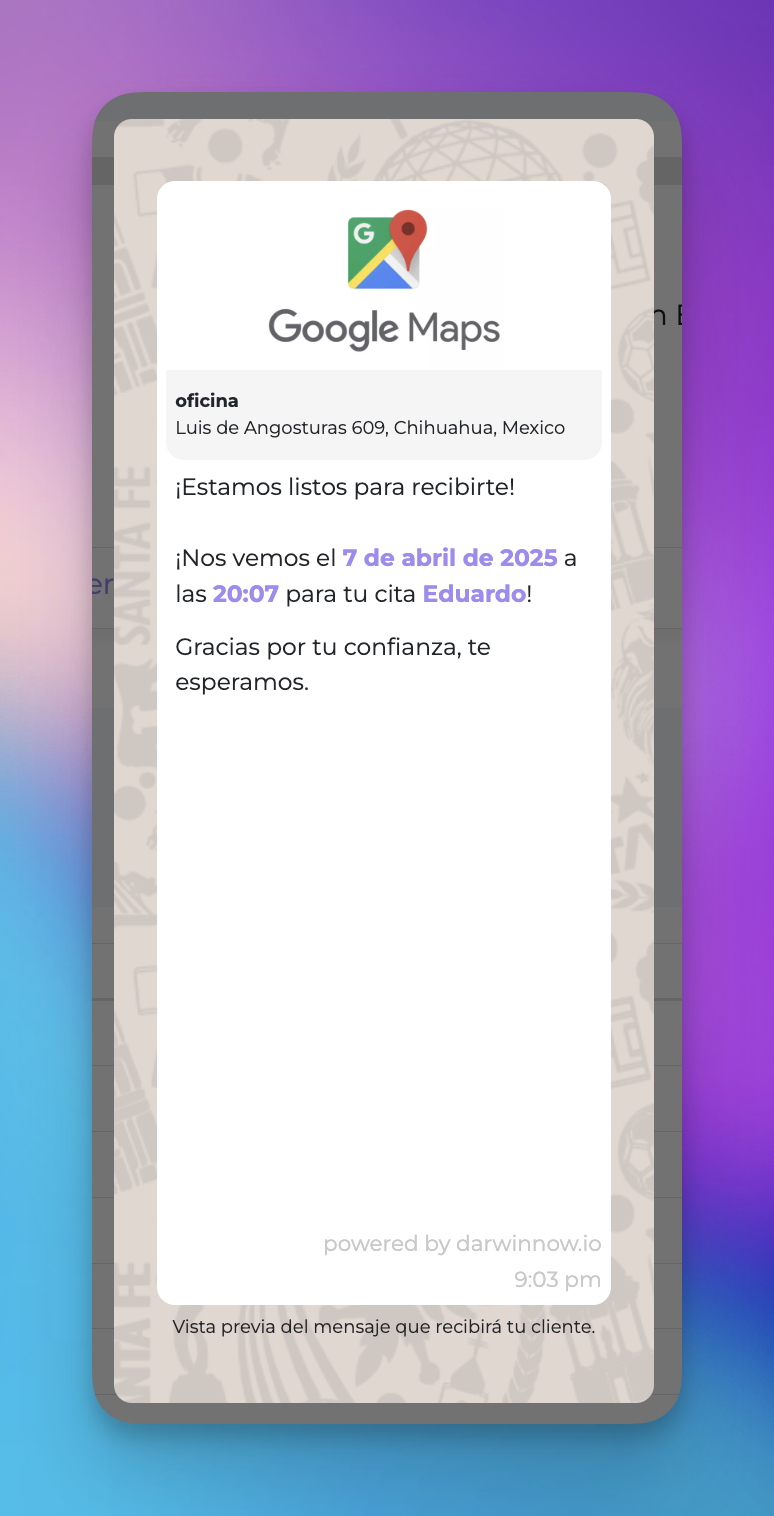
Preview
On the right-hand side, you’ll see a real-time preview of how your template will appear.
Press the “Show Custom Fields” button to insert new variables.

To insert a variable in the message body, just click on the one you want to use.
You can include data such as:
Appointment date and time
Your business name
Client’s name
Custom Variables
If you need additional information, click on "Custom Fields" to create and reuse new fields across templates.
Once you’ve configured and customized your message, click “Save.”
You’ve now created your personalized template! 

To let Darwin Now know when to send your message sequence, link it to an appointment type:
At the top of the screen in the “Appointment Type” section, click the ‘Add’ button.
What are the types of appointments and how do they work?
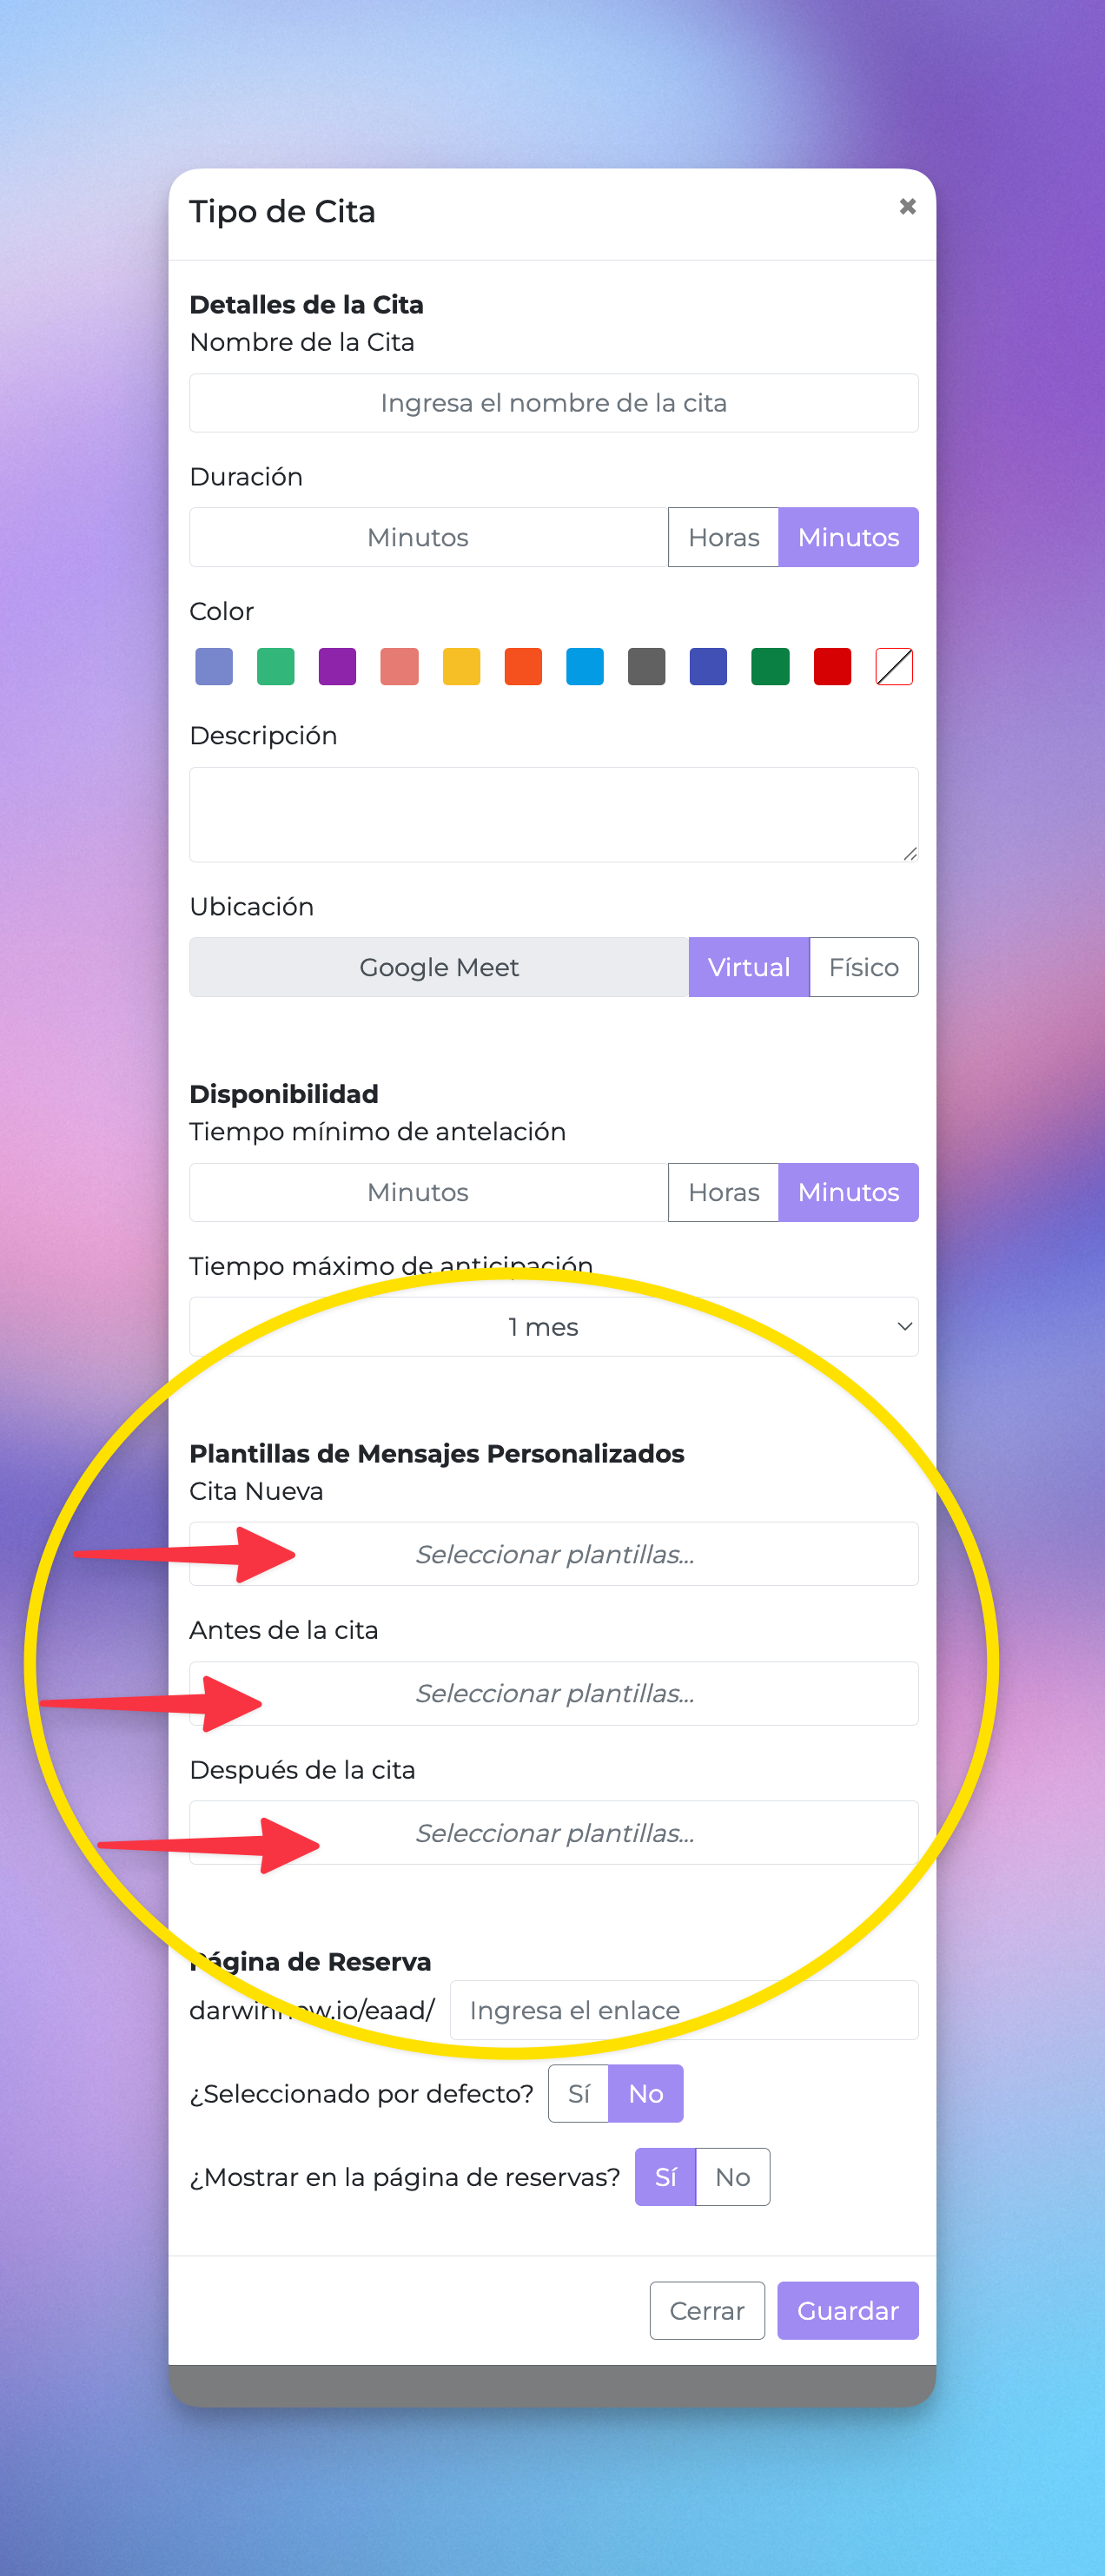
Dentro de la ventana de “tipo de vita”, hay una sección que dice: “Plantilla de Mensajes Personalizados”. Recuerda: existen 3 momentos donde se puede enviar tu plantilla:
Cita Nueva: La plantilla se envía al día que se crea la cita en tu calendario.
Within the "Appointment Type" window, you’ll see a section labeled “Custom Message Template.”
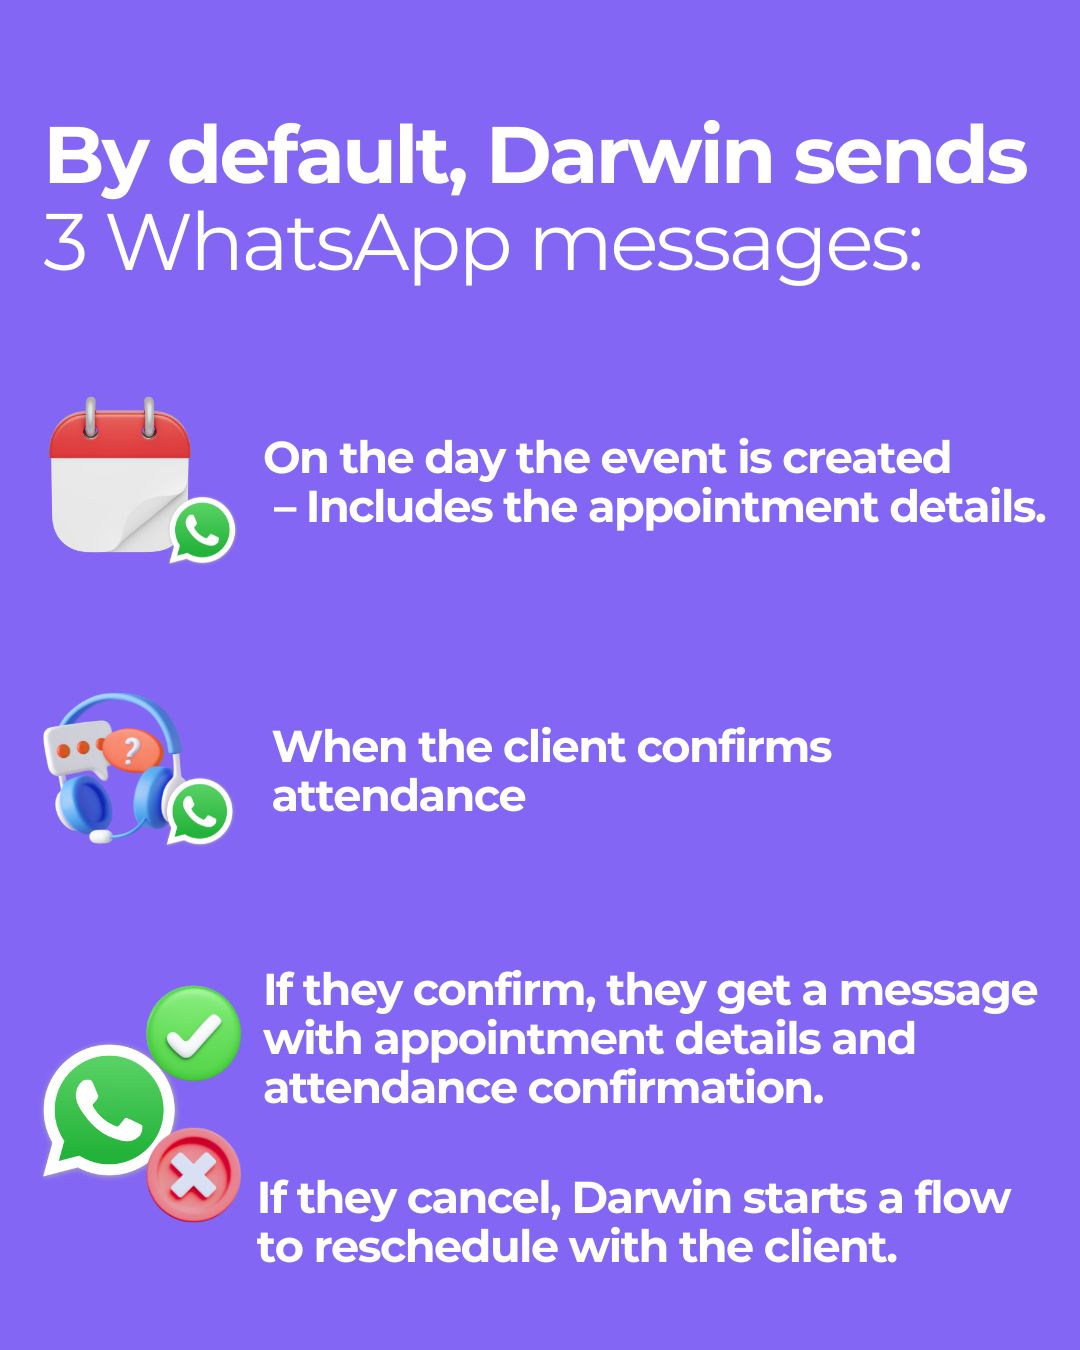
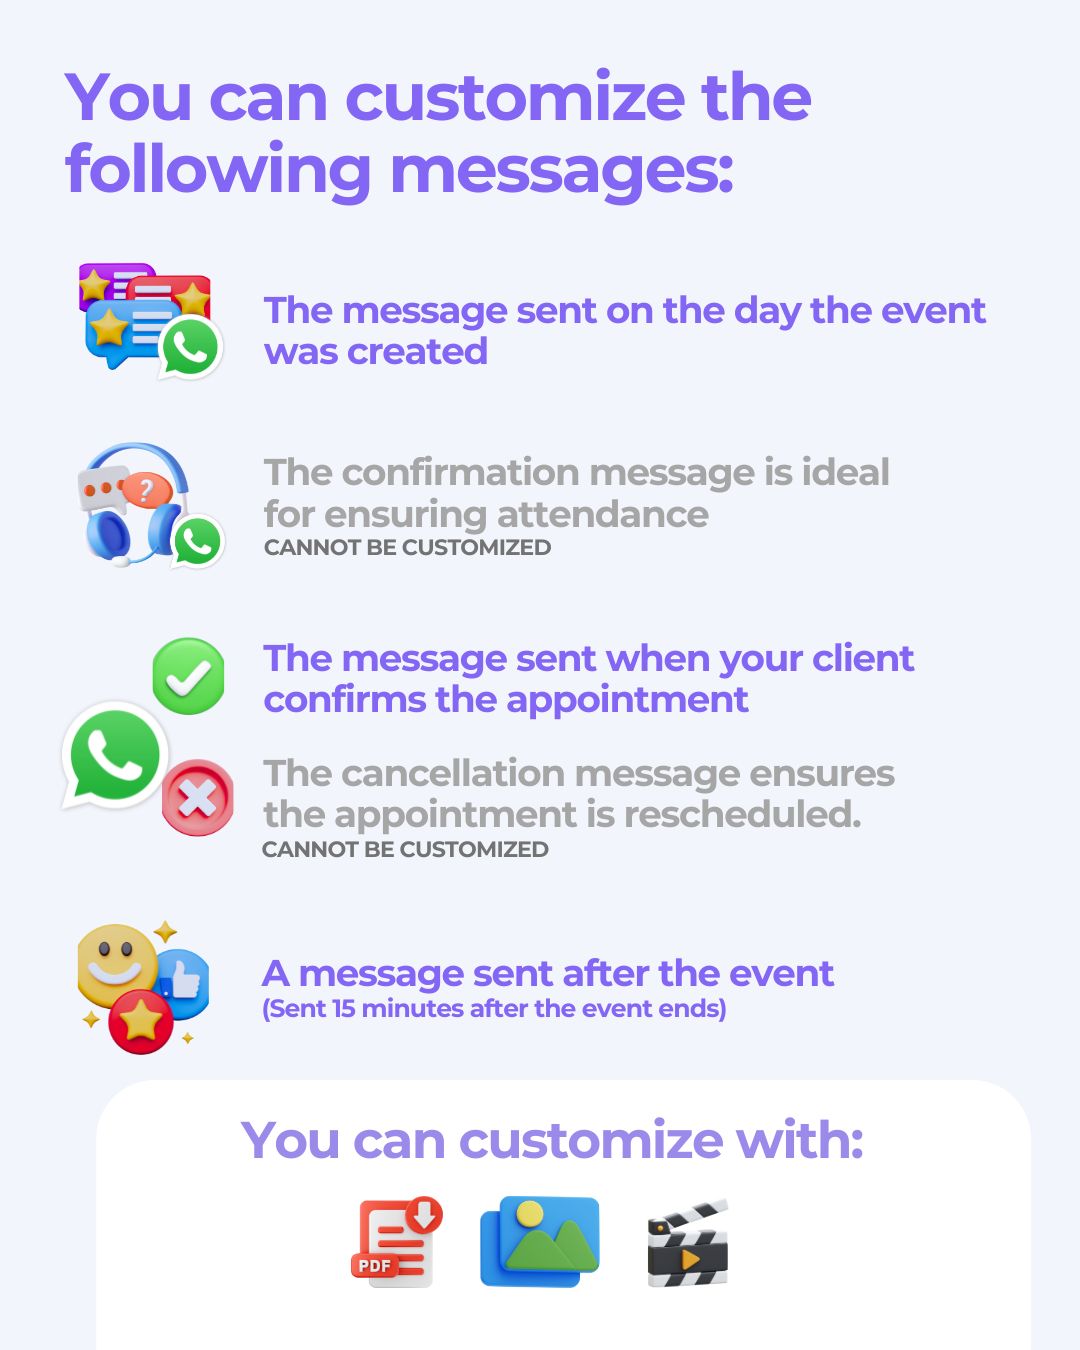
Remember: There are 3 key moments when your template can be sent:
New Appointment: Sent the day the appointment is created in your calendar.
Before the Appointment: Sent when the client needs to confirm attendance.
After the Appointment: Sent automatically 15 minutes after the appointment ends.
Clicking on any of these stages will show you the list of templates you’ve already created. Tap the one you want to use.
To remove a template, just click it again.
You can combine templates however you like 
You can select up to 2 templates per stage.
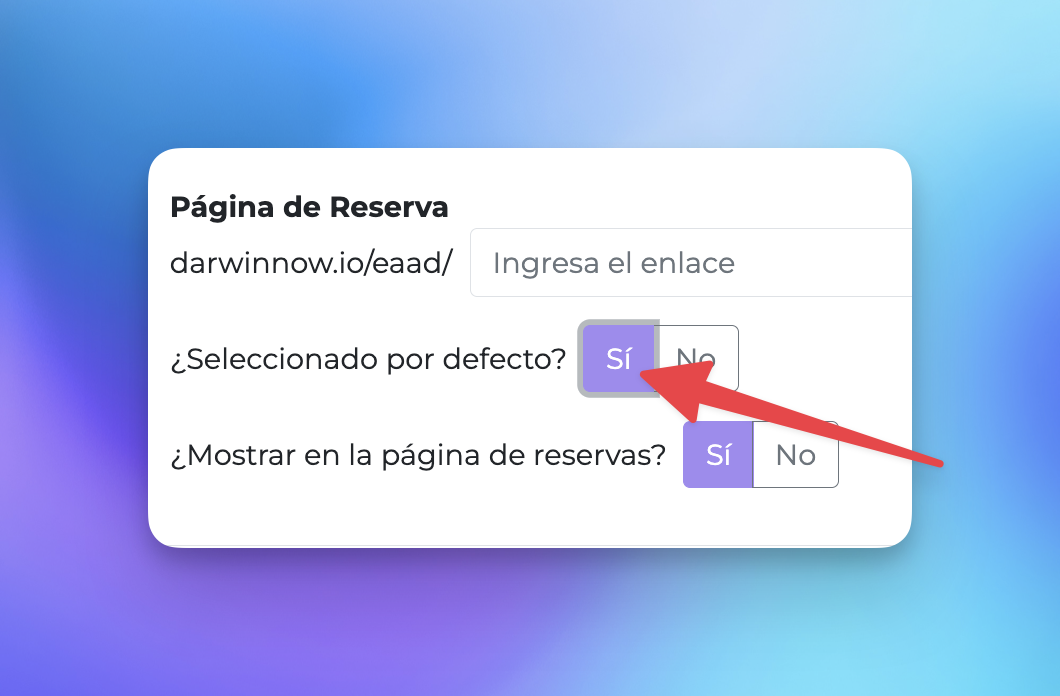
To have these messages sent by default for all your events, enable the option “Selected by Default.”
Finally, before launching your communication, let’s test how the message looks.
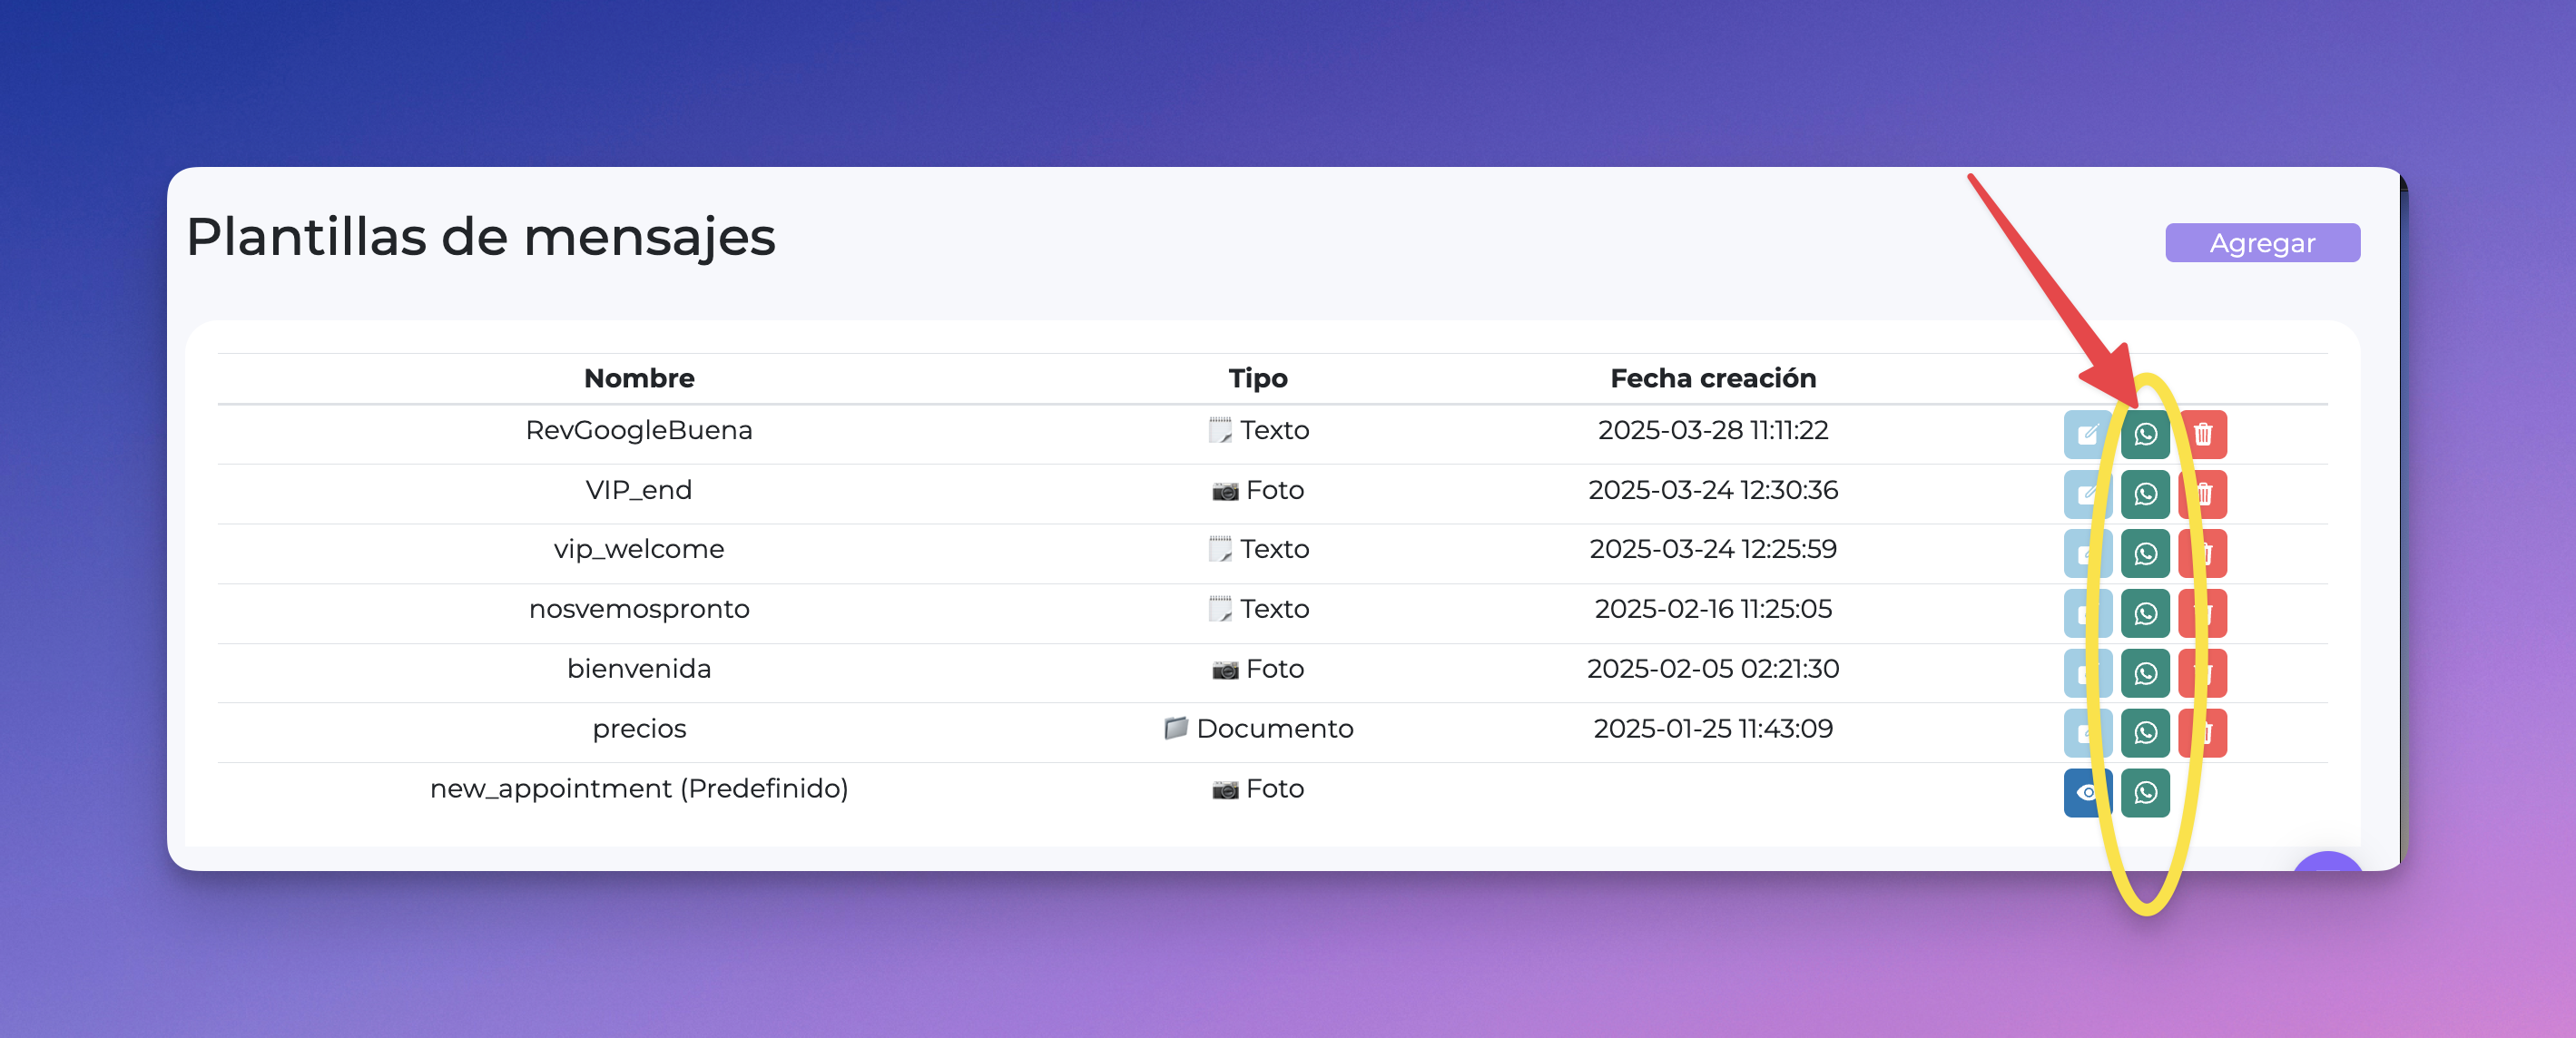
Click the WhatsApp icon at the end of the template’s row.
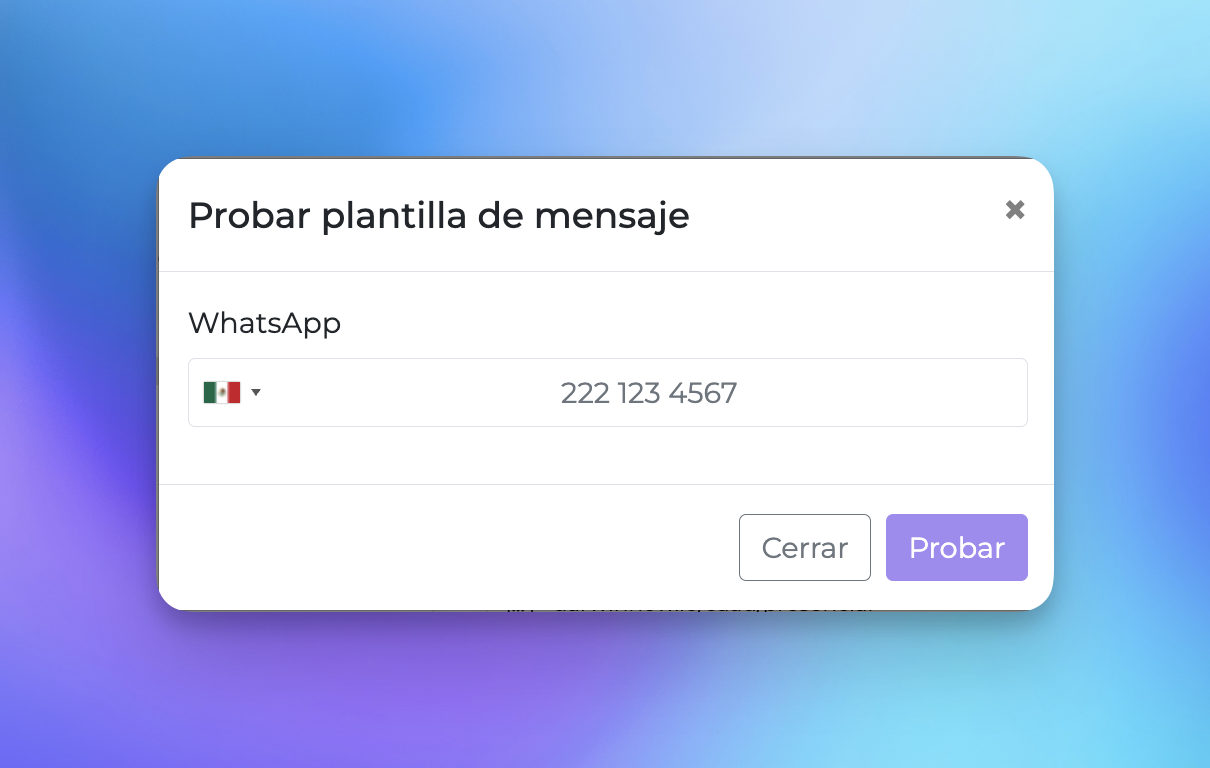
Send a test message to your own phone to verify the format and content—just as your customer would see it.
 Done! With these steps, you’ll be able to create and assign personalized message templates in Darwin Now, improving communication and the overall experience for your clients.
Now it’s easier and faster to send the right message at the right time!